
Subscribe to our Autosphere magazine and our weekly newsletter to get the latest industry news.
Automotive News, Expert Advice, and How-tos
Suspension Systems: Knuckle Deep Dive
Autosphere » Mechanical »

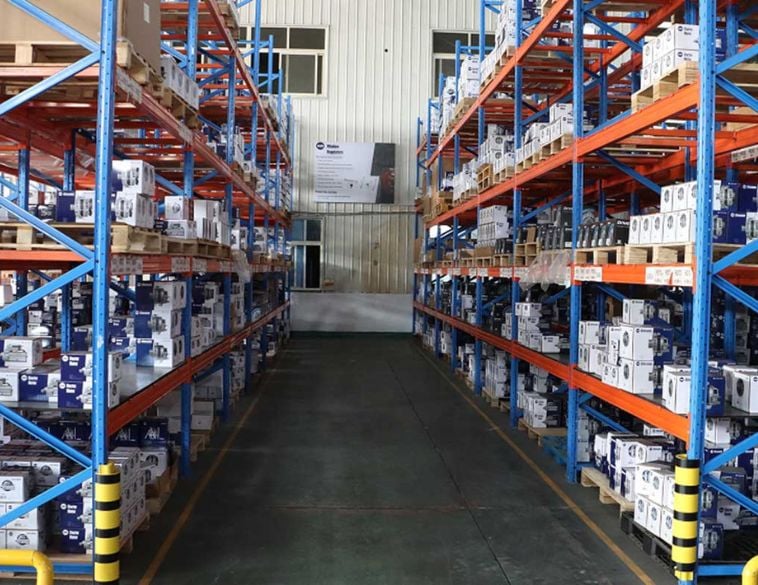
Victor Moirera and Mac Chastain hosted an in-depth webinar entitled All About Knuckles as part of Mevotech’s on-going series of virtual education sessions. Photo: Mevotech
These critical components require specific repair/replacement procedures and consideration by technicians to perform at their best.
When it comes to a vehicle’s suspension, the knuckle performs one of the most important functions. It attaches to the wheel hub or spindle, providing a critical link between the vehicle and the road. It also attaches to the control arms, making it an integral part of how the vehicle handles, as well as how it accelerates, steers and stops.
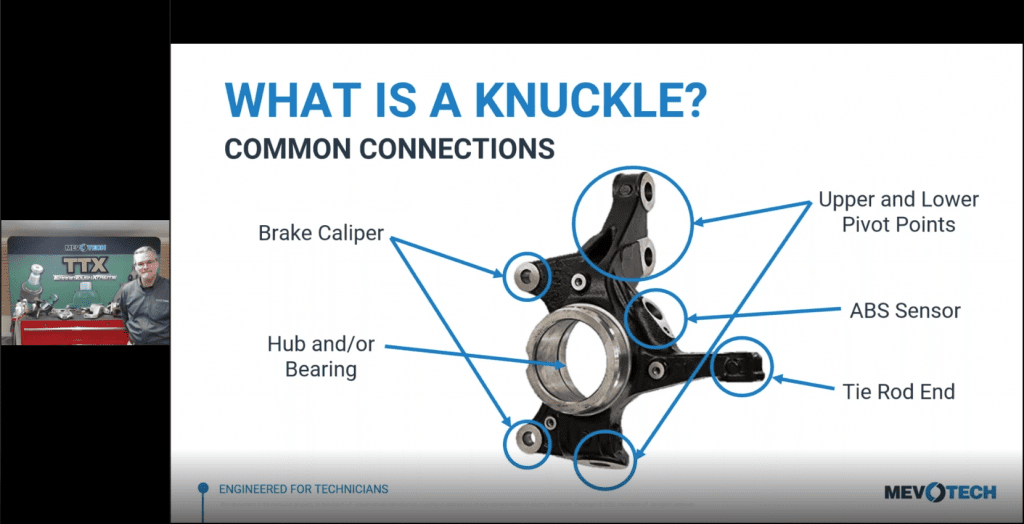
Knuckles serve as carriers for brake caliper brackets, ABS sensors and wheel hubs and at the front, link with the tie rod ends as well as the upper and lower suspension attachment points.
Yet despite the important role knuckles play in a vehicle’s overall performance and safety, a lack of understanding of what’s involved when replacing or maintaining them can lead to all sorts of problems, both for the vehicle and its owner as well as the service shop that performed the repairs.
To help avoid those issues, Mevotech conducted an online webinar, hosted by Victor Moreira, Manager, Technical Support and Mac Chastain, Product Specialist (U.S.).
This webinar provided an overview of the various types of knuckles currently in use, as well as some top tips on when it comes to removing and replacing them.
Common types
Today, the most common types of knuckles found on vehicles in regular use are those that work with MacPherson Strut suspension.
In this design, the shock or damper tube connects directly to the knuckle, either via a bracket that’s bolted directly to the damper or pinched to mate with the knuckle.
Once very commonplace, though today, used more on high performance and some luxury vehicles is the short-long-arm (SLA) or double-wishbone design.
Here, there are upper and lower control arms which incorporate a ball joint on each that serve as pivot points and connect to the knuckle. Often, they have a ball joint that is pressed into the knuckle, which is in turn, connected to the lower control arm.
A newer design that is mostly seen on European vehicles but now proliferating on some Domestics and others is the multi-link design. These are far more complex, with multiple attachment points which make them more difficult to inspect and diagnose, as well as replace.
Mac Chastain noted that the taper attachment design on these types of knuckles, where you have a ball joint or control arm linked, as well as a pinch-bolt style attachment and multiple attachment points can make these a real headache, especially if the vehicle owner is complaining of handling, ride and drivability issues.
The fact that many of these are now made from aluminum as a gesture toward weight savings, further complicates matters.
For technicians, understanding which knuckles and suspension components are steel and which are aluminum is absolutely critical. Mac Chastain noted that aluminum is softer and not as forgiving as steel, so when you’re tightening or torqueing with an impact gun, it can be much easier to damage them if you’re not paying attention.
As vehicles accrue mileage and the suspension is subjected to repeated potholes, expansion joints and rough surfaces, both on and off-road, components start to wear out.
Typically, ball joints tend to wear out every 100,000 miles (160,000 km) so if you have a vehicle in your shop with this kind of mileage, inspecting the knuckles and ball joints should be a priority.
Diligence required
When inspecting, Moreira and Chastain said that you really need to do your diligence, as a technician as often the knuckles can be painted, so you might not know at a glance whether they’re steel or aluminum. One trick around this is to always have a magnet handy, as the magnet’s attraction to the material is a good indicator of the material you’re dealing with.
On the subject of attachment points, ball joints and the pivot points on the knuckle are the most prone to abuse during driving and also damage when technicians are removing or replacing hubs or fixing axle seals or boots.
Victor Moreira said that whenever there is a need to replace the ball joint or remove the knuckle from the vehicle, it is critically important to inspect the taper receivers at the top and bottom for any signs of deformity, corrosion or damage.
“If you actually look down in that taper receiver, you will see a little ridge. You can even run your finger down and your fingernail will catch it,” explained Moreira. “It is always really important to get rid of that because the new ball joint may need to go past that point, and you don’t want to have any gaps [between the receiver and the ball joint].”
Ensuring the fit is tight is critical, because if there is any play or movement of the ball joint, it will damage the tapered receiver and cause stress on other parts of the suspension, affecting the vehicle’s handling and braking ability.
Keeping it clean
Mac Chastain noted that another key point is ensuring that technicians make a point of keeping everything clean. This particularly applies to those of us that work in Northern climates where road grime, salt, sand and brine can wreak havoc on the underside of vehicles.
If any dirt or moisture or other foreign matter gets inside the tapered receiver, it won’t allow it to sit properly, creating a gap and causing the ball joint to move. Additionally, keeping the area around the dust boot or fastener clean is also critical as any corrosion or dirt here can loosen the nuts which keep the ball joint in place.
As Victor Moreira pointed out, a great tech tip when performing this type of work is that, once you’ve cleaned the tapered receiver and the mating surface, use a small amount of grease to create a wet, strong seal between the ball joint and the boot.
Also, when working on taper receivers on a knuckle, always make sure the bolts are torqued to spec, since under torqueing or over torqueing can easily damage the receiver, particularly those on aluminum knuckles, causing the taper to crack or in some cases break off.
When performing ball joint and knuckle replacement, it’s also essential to ensure all the attachment points, including tie rods and control arms are also properly torqued to spec, as if any one of them is loose or too tight, it can prematurely wear out the knuckle, tie rod or even the control arm.
“It takes no time at all to inspect these things,” said Chastain, “and [by doing so] you can end up saving the customer a lot of trouble.”
On pinch-bolt type knuckles—found on a lot of European vehicles and increasingly some Domestics as well — technicians need to be very careful when opening the tabs to remove the bolt.
Too much pressure or force can easily break the tabs. Also, if the knuckle is aluminum, in many cases the ball pin or stud inside is actually steel, which causes an electrolysis reaction.
If salt or calcium is added into the mix, such as a result of driving on slushy winter roads, it can accelerate the process, causing the studs to actually seize inside the knuckle.
No heat
Victor Moreira says he’s seen a lot of instances where technicians try to use heat via a torch to remove pins which he says is an absolute no-no. Instead, technicians should rely on speciality tools and take their time to remove them, as it will save money in the long run.
Trying to rush the job can often lead to breakage and added cost for the customer and shop in the form of a new, replacement knuckle.
When working on pinch-bolt systems, not only is it imperative to keep everything clean, it is also essential that the new ball joint stud aligns exactly and that the right size bolts are used.
“If your pin is not in the right location and you have to use a hammer to get the bolt into place, it is not lined up properly,” said Moreira. “If you’re doing this, it means you’re hitting that ball stud too high or too low—and not allowing that pinch bolt to go into the right spot.”
On pinch-bolt systems, correct torque sequencing for the bolts is also essential to prevent any problems. Doing so requires technicians to research what is required for that particular assembly as they can vary greatly depending on the design and materials used for the knuckle assembly.
Performing this due diligence each time you’re servicing or replacing ball joints or knuckles will save both time and money in the long run.
Press-in ball joints
Once the technician has determined that everything is clean, it’s time to install the new ball joint. In many cases, the new ball joint is pressed in to ensure a snug fit in the knuckle, but doing it properly means it must align correctly and using the correct tools to install it correctly is also key.
In the past, technicians often tried to re-install sets of ball joints twice, three or four times. Today, the situation has changed. With aluminum knuckles, a one-time replacement is the norm and on modern steel items, two to three times should be considered the maximum.
Also, when pressing in the new ball joint using a C-clamp, an important tip said Moreira, is to oil the threads on the rod, making the process easier and minimizing friction resistance on the threads as you press in the ball joint.
Sleeved ball joints also require care. Often when removing the old ball joint from a tapered sleeve knuckle, the sleeve insert will come off with the ball joint. Sometimes it will be stuck in the taper which can be a pain to remove. When working on these kinds of ball joints it is also important to install the correct types of nuts, since the nut has a flange on it and does double duty, keeping both the ball joint and sleeve in place.
Ultimately, when performing any kind of work on knuckles and ball joints, Moreira and Chastain say the ultimate factor is being diligent in both the inspection and repair/replacement process and keeping everything as clean as possible.

JOBS
 |  LASALLE LASALLE Full time Full time |
 | SAINT-CONSTANT Full time |
 | GRANBY Permanent |
| LASALLE Full time |
 | GREENFIELD PARK Permanent |