There are different types of rivets used in different vehicles, so technicians must follow what OEMs are recommending.
Today’s automobile is essentially a giant smartphone on wheels. At the same time, the imperative to make vehicles safer and more energy-efficient is also making them more difficult to repair.
A recent report by McKinsey & Co. entitled “Lightweight, Heavy Impact: How carbon fibre and other lightweight materials will develop across industries, and especially automotive,” provides a detailed look at how these materials are set to become commonplace within the next 20 years. Among the motivators is a burgeoning demand for lighter-weight vehicles to reduce CO2 emissions. As well, alternative power sources—notably battery-powered electrics—require heavier batteries and related components, adding to the impetus to reduce weight on other parts of the vehicle.
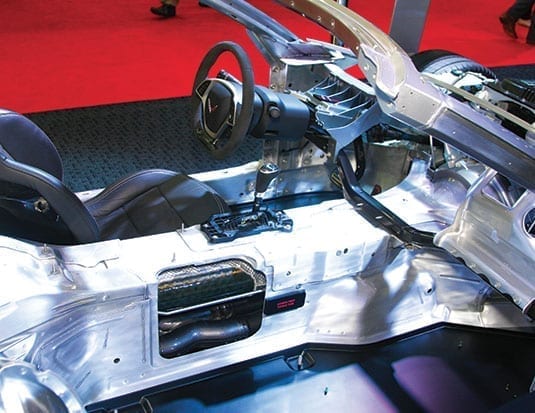
With stronger and lighter materials being used in today’s vehicles, we see a combination of several different types of steels, together with aluminum, magnesium, plastics and carbon fiber. Not everything can be welded, so we are now seeing a number of new and different joining methods. Heat will weaken high strength steels and destroy ultra-high strength steels.
Rivet systems
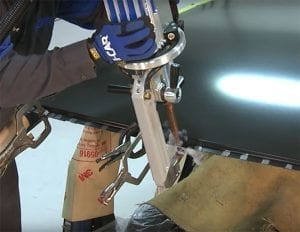
Rivet bonding—the use of rivets combined with structural adhesives to join panels—is now very common. Most OEMs use rivet bonding on side and back panels, front hood closures, headliners and many inter-structural reinforcements of the cab designs. However, technicians in collision repair may lack the training and information for professional repairs that require rivet bonding.
“When it comes to riveting systems, you need to know what brands you are repairing. Most of the certified shops specialize in a couple of brands and have the equipment for those brands of vehicles,” says Vince Filice, President Filco.
Eric Léveillé, Vice-President Paint and Body Equipment at UAP, agrees with Filice. “Shops need to address what types of cars they are fixing,” he says. “There are different types of rivets used in different vehicles, so they have to follow the right procedures. What automakers are asking is put the car back together to OEM standards. They are calling and asking if you are properly equipped with the right type of riveters.” (Technicians can visit the I-CAR website (i-car.ca) and click on the link that will take them to a page where they can see all the specs for all of the car makers.)
“The information the shops need is available, they just need to know where to look,” adds Léveillé. “Also, look for the OEM bulletins on how to repair these cars.There are some very specialized rivets that must be used correctly to make the proper repair and bring the car back to OEM specs. The last thing you want to do is have to re-do the work because you didn’t do it correctly the first time.”
Rivet repairs
There are several factors to consider when repairing with rivets. Rivets alone are great for holding panels together in the shop; but with movement and vibration, fatigue and corrosion can result, leading to panel bond failures. When it comes to dissimilar substrates, the laws of physics work against us: for example, when an aluminum panel comes into contact with a steel rivet, galvanic corrosion can occur. If the joint is not properly sealed, an electrolyte such as an acid, moisture or road salt can quickly start the corrosion process.
OEMs will apply anti-corrosion coatings on aluminum and other metal panels where the rivets attach. Technicians, however, may remove this corrosion protection during panel removal or surface preparation, leaving bare metal exposed. Sometimes, these panels may get riveted back together without the corrosion protection restored. This can result in a compromised repair—which can harm the reputation of the repair facility. Working with aluminum also requires special precautions related to worker safety and substrate preparation, as well as proper process mapping and site and workplace hygiene. Always refer to OEM and vendor information to help educate yourself on best practices when working with aluminum and mixed metal repairs. Follow these recommendations diligently—even a small deviation or missed step in the process can cause a repair failure.
Rivet bonding
The use of an adhesive such as 3M PN8115 Panel Bonding Adhesive in addition to rivets when performing a repair can result in higher bond strength versus rivets alone. It can also provide leak prevention, reduced rivet vibration and lower point stress, which can reduce fatigue and cracks. Just as importantly, the adhesive can also serve as an isolator between dissimilar metals—an excellent way to reduce the potential for corrosion.
The Process of Rivet Bonding With Adhesives
In this process, the adhesive is used both as a bonding agent and also as an isolator. It requires specific steps for proper application:
1. Straighten the host panel mating flange on the truck to ensure proper fit-up of the service part.
2. If using rivets that require drilling: clamp the panels, drill the holes and deburr the drilled holes as needed.
3. Clean with an approved low-VOC compliant surface cleaner on the body and the service part.
4. Sand the mating flanges on the vehicle and the service part using a 3M 80 grade abrasive and a dual action sander. (Remember, on aluminum the surface needs to be coated within one hour to avoid surface oxidation.)
5. Re-clean both surfaces with an approved low-VOC wax and grease remover.
6. Apply a thin bead of adhesive to the mating flange(s). Using a filler spreader or acid brush, cover bare metal on the mating flange completely.
7. Apply a second bead of adhesive to achieve adequate bond-line thickness, and clamp the part into place. Apply a thin coat of adhesive on the edges of the drilled holes to cover exposed metal before inserting rivets.
8. Apply a second bead of adhesive to achieve adequate bond-line thickness, and clamp the part into place.
9. Install the proper rivet recommended by the OEM.
10. Remove the clamps. Remove excess squeeze-out before the adhesive cures, as grinding cured adhesive can create corrosion hot spots and collateral damage.